Part four of four
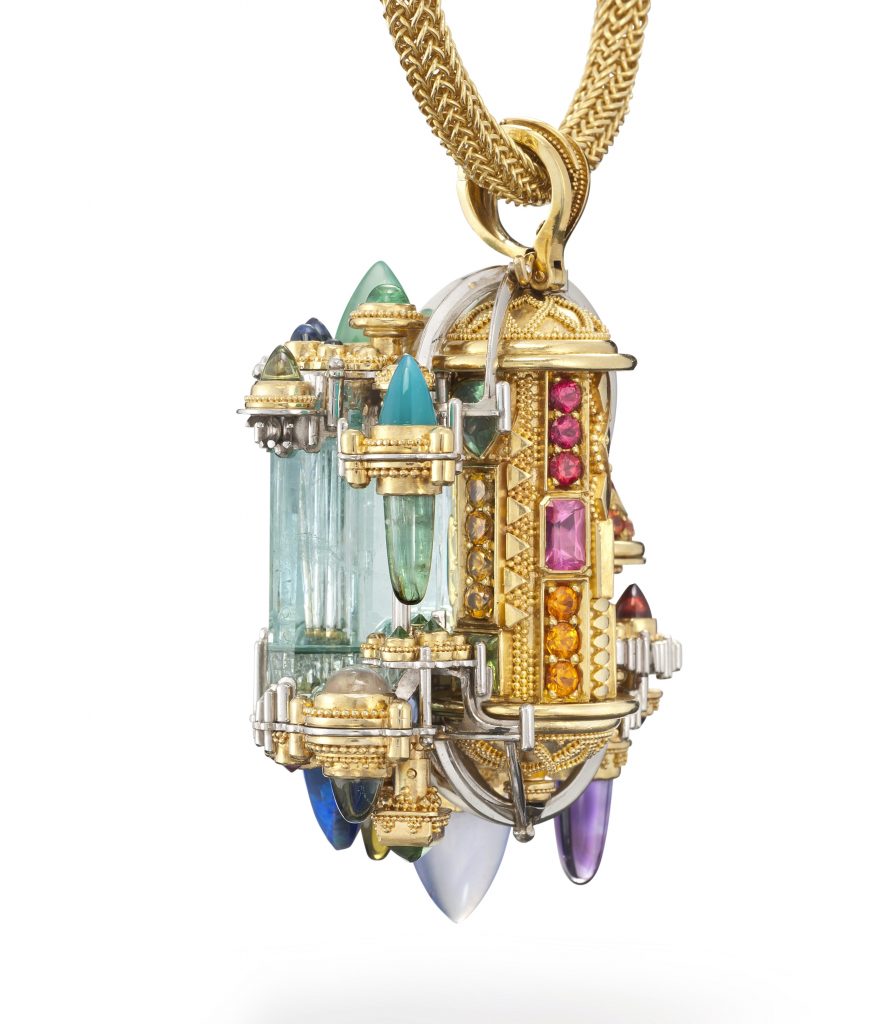
Putting It All Together
Now all the different elements and parts were finished: the platinum caps with their multiple shelves were done, the gold stone settings were shaped to fit onto their corresponding shelves, granulated, and the stones set.
Holes were drilled through the small tube bits arranged around the bezels, and also in the exact locations on the platinum shelves, for riveting.
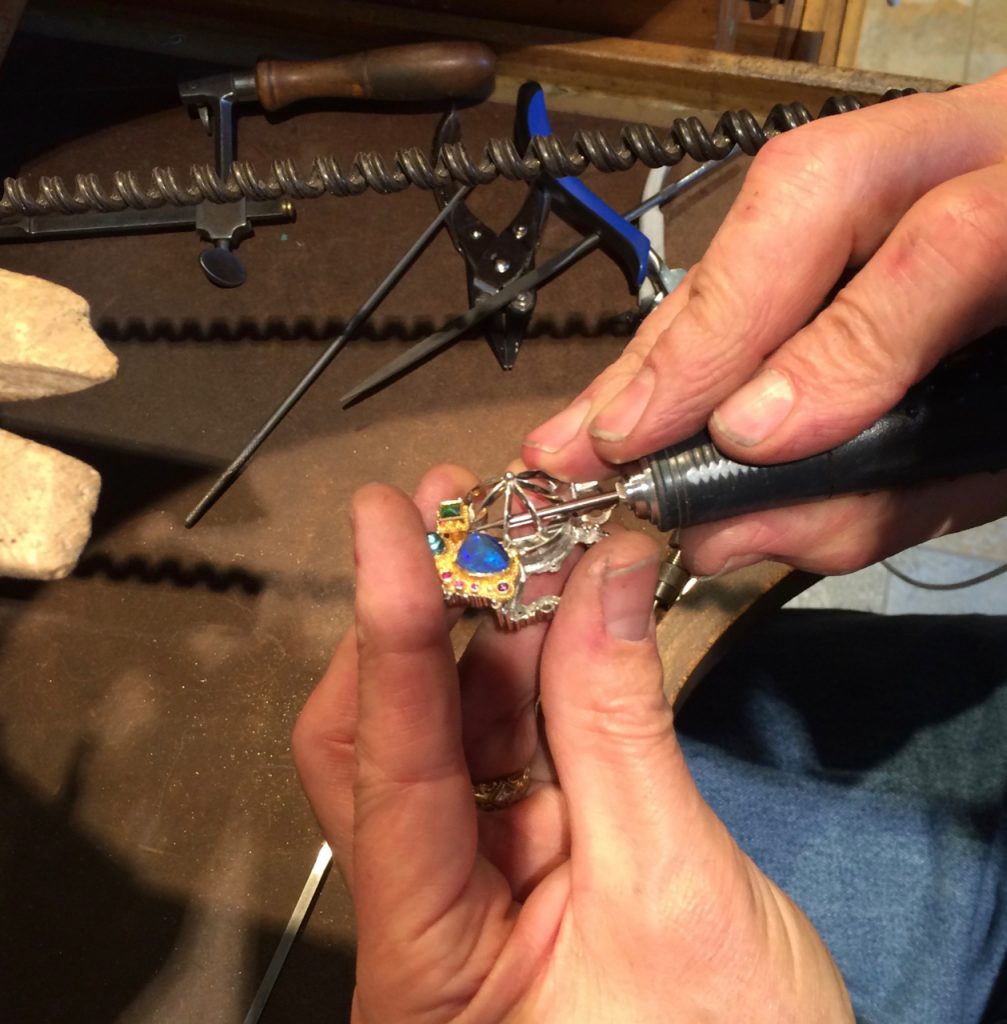
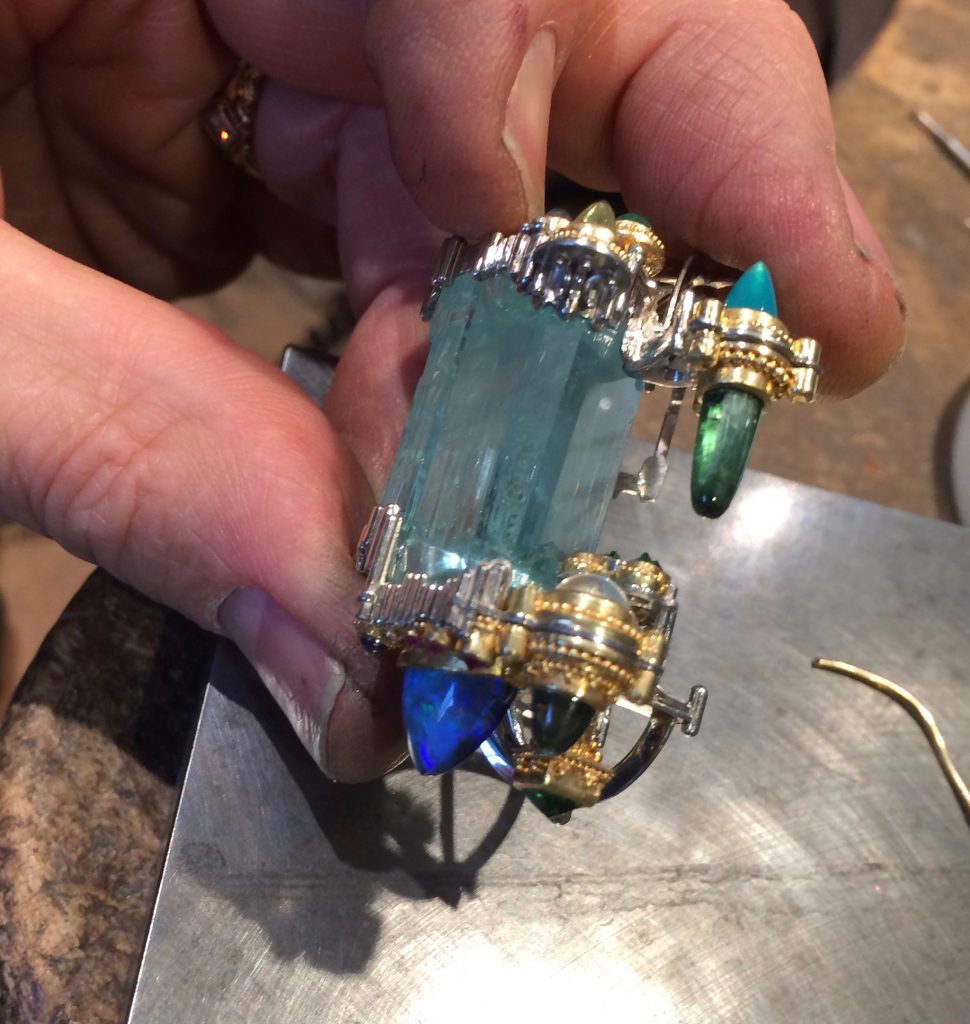
The prayer wheel was completed with the soldering of the new bail to the top of the spindle, and the catch system was finished on the upper cap cage. Three platinum pins, made of 8-pointed star shaped tubing, were ready and in position for riveting, to hold the two caps together. Now came the time for assembly.
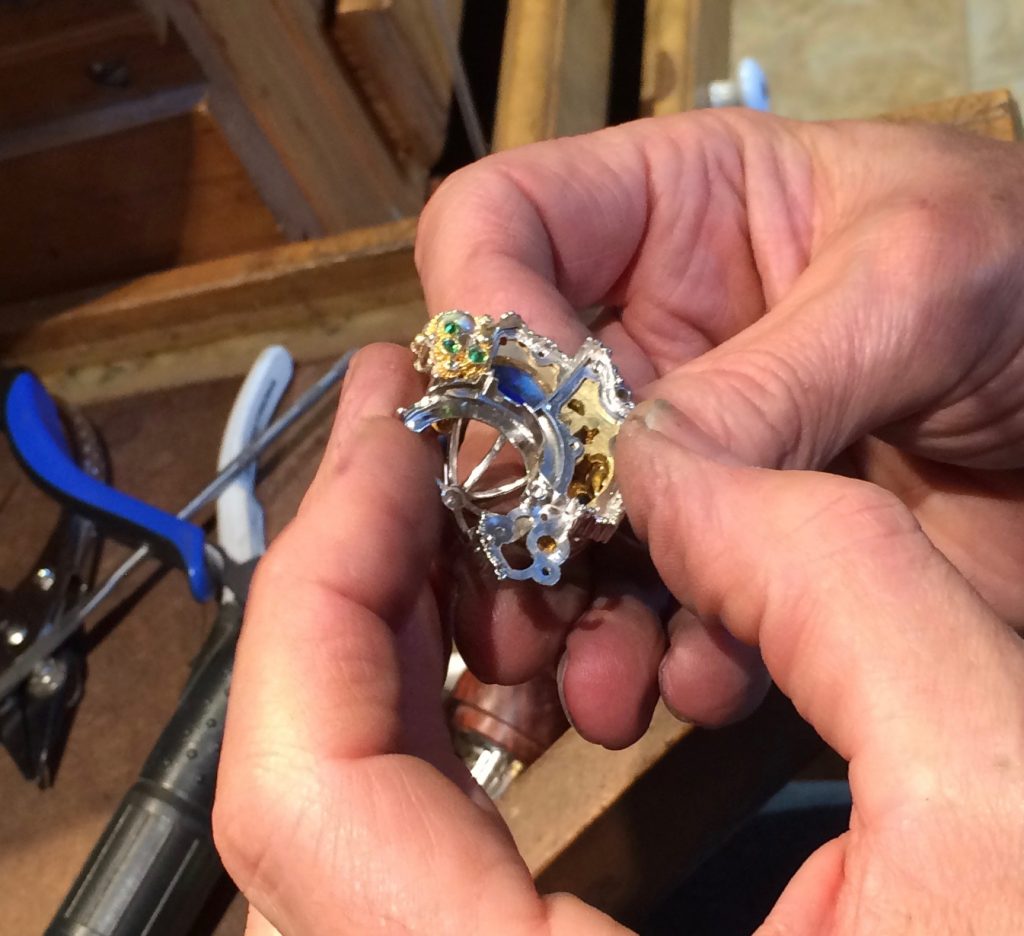
Because there were so many different shelves, elevations, and stones, care had to be taken to position the rivets, and that involved a lot of planning ahead. Certain areas had to be riveted before others, as access to some areas would be difficult otherwise. The many, closely set high dome bullet cabs often left little room for compressing the rivets, there were very close tolerances.
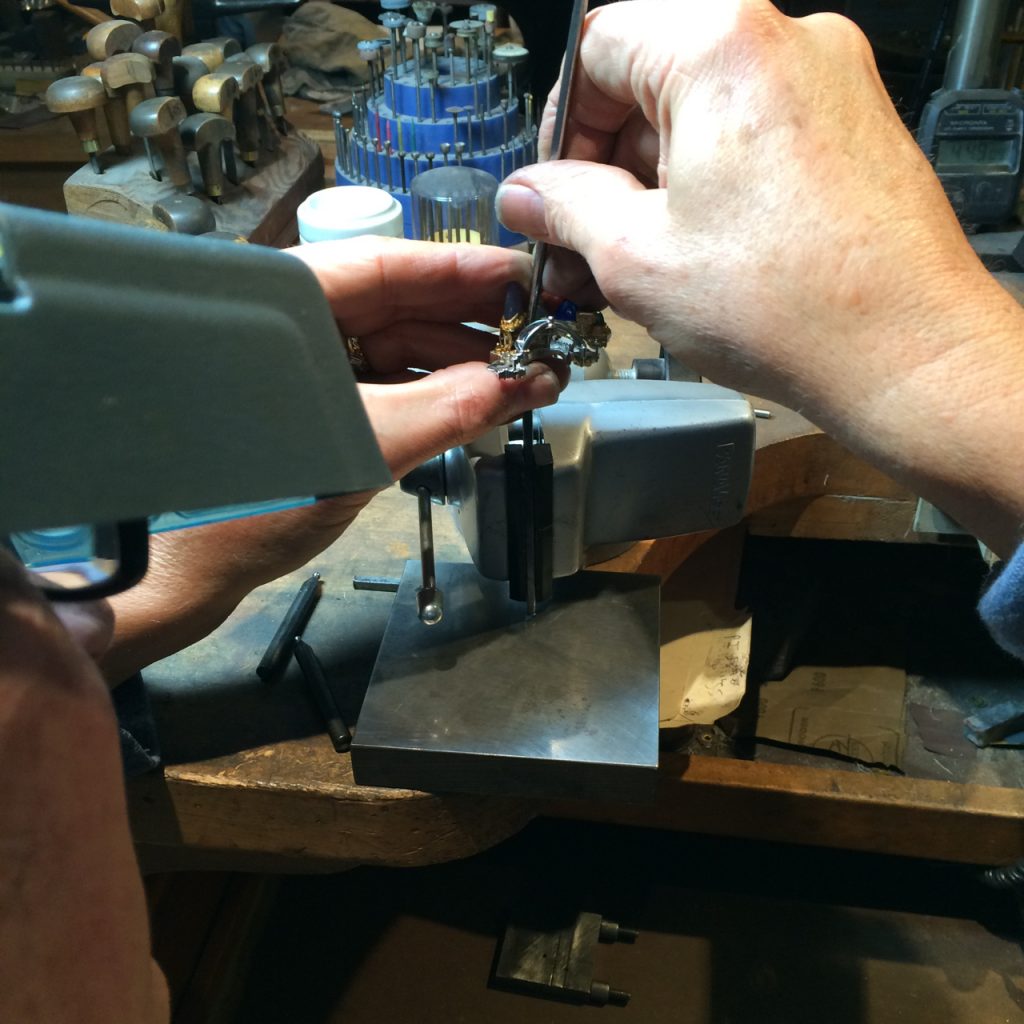
One by one, each shelf got its gold additions…
..and some even had gold on both sides, (vertically aligned stones facing both up and down) and the rivets would connect both sides. When all the gold sections were riveted to their shelves on the platinum caps, the caps were placed top and bottom onto the crystal, the three pins were inserted into their fittings, and the last rivets were hammered, holding the piece firmly together.
The prayer wheel was locked into position, and the piece was done!
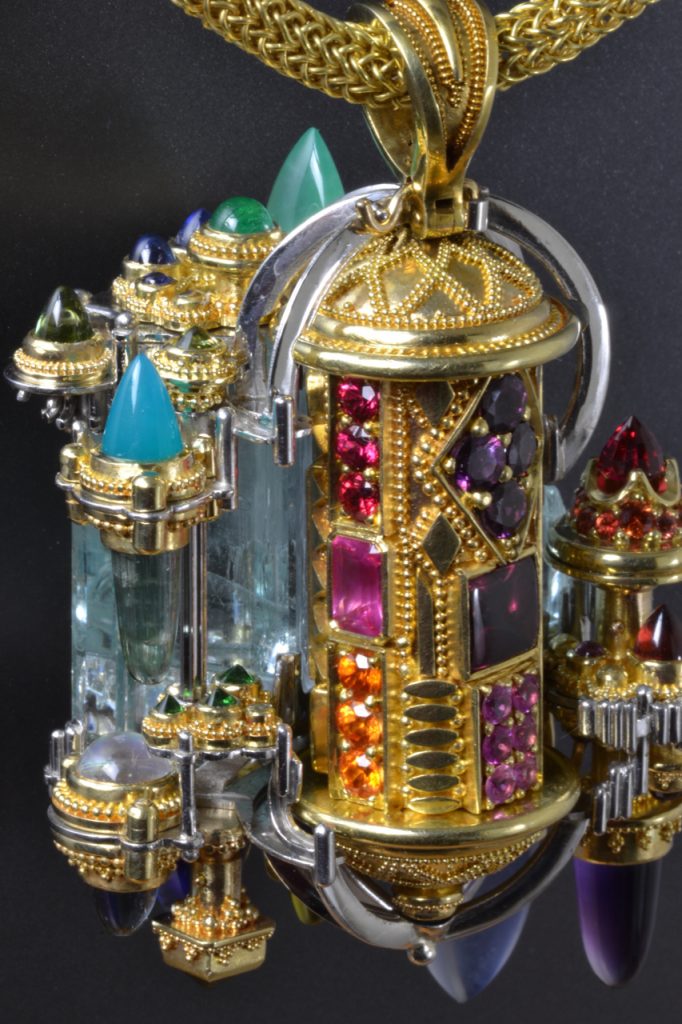
What had started as the “Garden of Vanishing Illusions’ was now the “World of Vanishing Illusions”
The fantasy world I had envisioned was mostly there…
… And, as with any creation, the result doesn’t always rise to one’s expectations. There were certain areas or angles that were, to my eye, nearly perfect, and others that weren’t quite “there”. But, the piece was really interesting from every angle, wearable, and the motion of the wheel worked perfectly! It was a world unto itself, and I was sufficiently satisfied to deliver the piece to the client, almost two years after we had our first meeting.
______________________________________________________________________________
______________________________________________________________________________
THANK YOU FOR FOLLOWING THE MAKING OF ‘VANISHING ILLUSIONS’!
ARE YOU READY TO LEARN JEWELRY MAKING FROM A TRUE MASTER JEWELER? READY TO TAKE YOUR SKILLS TO THE NEXT LEVEL?
BE SURE TO VISIT OUR ONLINE COURSE SELECTION, OR LEARN ABOUT STUDYING IN PERSON WITH CELEBRATED MASTER GOLDSMITH KENT RAIBLE
INTERESTED IN KENT RAIBLE’S AVAILABLE ART JEWELRY? VISIT HIS JEWELRY WEBSITE GOLDEN SPHERE STUDIOS OR VISIT US ON 1STDIBS.COM
